Import Data Intermediate Mapping
Data Intermediates need the data points that are beign imported to be mapped in order to import them
The intermediate folde can be redefined with using the load button on the Intermediate folder section
![]()
The save orignal excel allows the user to save the orignal excel file to a the database via the ![]() button, see here for details
button, see here for details
![]()
The Require properties checkbox allows the data to be imported without properties when unchecked, it is instead brought in as attributes. (the Item name radio button and property are still required)
The Unique IDs checkbox allows each line imported to have a unique ID automatically assigned to it - this is used to apply a unique ID to every equipment being imported - if items in the spreadsheet being imported have the same equipment name then they will be overwritten if this checkbox is left unchecked.
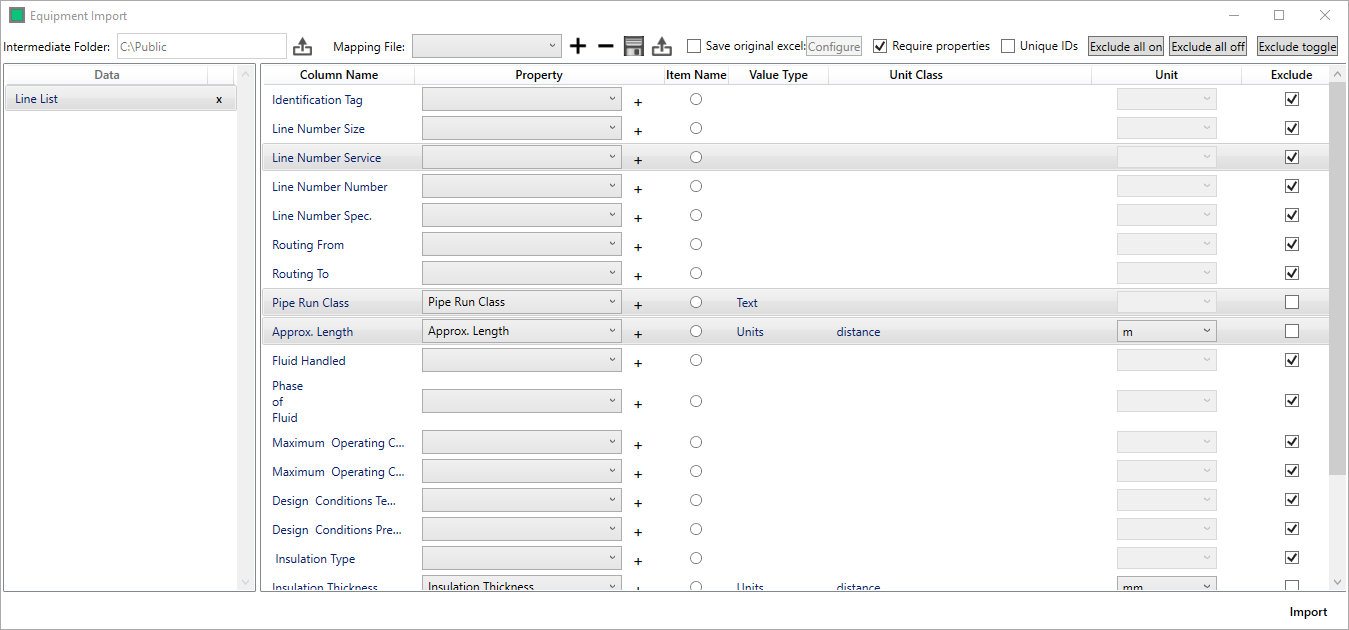
There are Eight areas to select from during the mapping process
- Data - A selecteable list of the Data Intermediates that being imported. Each Data Intermediate needs to be mapped
- Column Name - The name of the property (taken from the headers in the datasheet)
- Property - The name of the Hazid Integrity property to which it will be mapped, select via the dropdown or the + button
- Item Name - The selected property will be used as the Equipment name in Hazid Integrity.
- Value Type - The selected Hazid Integrity property will have a Value Type which can be allocated in the Property Editor in the Model Library
- Unit Class - If the Value Type is Units, there will be an associated Unit Class (also allocated in the Property Editor in the Model Library)
- Unit - The Unit dropdown will contain a list of units that are associated with the given Unit Class
- Exclude - Check this appropriate box(es) to exclude unwanted column(s) the
 buttons enable properties to be excluded/included in bulk
In order to avoid repeating this process every time the same format of datasheet is imported, mappings that have been created can be saved to a Mapping File.
![]()
A mapping file is added via the + once some properties have been mapped, deleted with the - button, and saved with the ![]() .
.
An existing template can be selected from the dropdown and loaded via the ![]() button.
button.
Once the template is completed, clicking  will import the data.