Compare & Merge
Compare Drawings
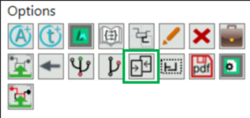
The Compare Drawings feature can be accessed through the document page in Classic Integrity by selecting the Compare Drawings  icon.
icon.
In the Drawing Comparison window, you are given the option to choose two drawings or versions of drawings to compare to one another. Under the first drop-down, one of three formats can be chosen: HDX file, Briefcase, or Version of the current drawing.
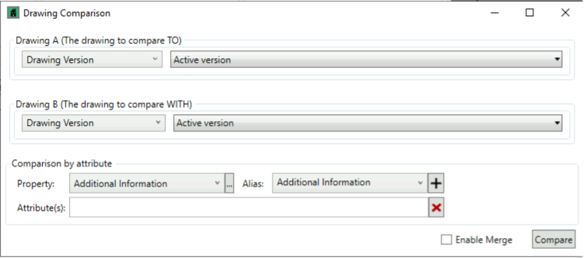
Drawing A is the drawing to be used as the source file while Drawing B is the new version we would like to compare against the source file.
Document Selection
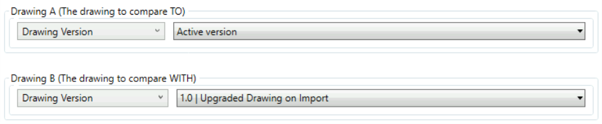
With Drawing Version selected, we can select between different versions of the same drawing to compare them to one another. The first option will always be the Active version of the drawing, followed by any previous versions.

A common usage of this configuration would be to compare the Active version of a drawing to an earlier version to assess the changes in between versions, as shown below.
It is also possible, however, to compare with a Briefcase or HDX instead.

When a drawing has been checked out using a briefcase, we can compare the changes made in the briefcase to the current active drawing version in the project.
When we have an external version of the drawing stored as a backup we can directly compare with the exported .hdx file by selecting the “HDX” option form the source drop down menu and navigating to the hdx backup file.
Attribute Source Selection
Once both drawings/versions have been chosen, a Property to be compared by must be selected in the Comparison by Attribute section. This property will be used to match items between the two drawings/versions, so it should be a unique attribute to each individual item of equipment such as an ID value or Item Tag. It must also be consistent between the two drawings for both items to be aligned.
The relevant Property can be selected by name from an alphabetically ordered drop down list or navigated to in the project tree using the Open Property Tree  icon.
icon.
The Alias used for a property may vary between projects and can be specified in the Alias field.
Once the correct Property and Alias have been chosen, pressing the Add Alias  icon will add the property to the Attribute(s) used for comparison. If multiple properties are used in the comparison, they will be displayed here as a comma separated list using the selected Alias for each property.

Attribute Output Selection
Once the Comparison by Attribute field has been populated, the attributes to compare between versions can be chosen in the “Attributes To Compare” section. These are the attributes that will be checked for any changes/additions between the two versions. As above, multiple attributes can be added at once and will be displayed as a comma-separated list. The Attributes To Compare field can be left blank if a mere visual comparison between drawings is desired without considering changes in a specific attribute(s).

With all the relevant attributes selected, hitting  will open the side-by-side view of the two drawings.
Drawing Comparison Window
After selecting compare, the drawing comparison window will open which contains both the drawings side by side and a summary of changes at the bottom.
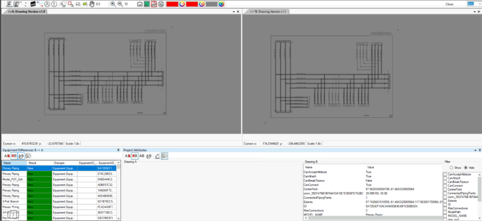
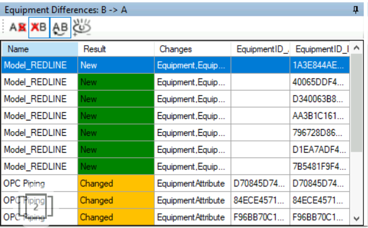
The bottom-left panel displays items that have been changed or added between drawings.
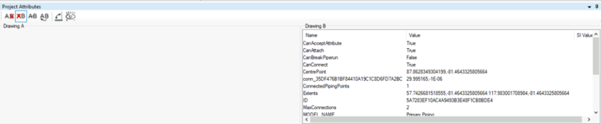
The bottom right panel displays the project attributes in each drawing for selected items.
The options available in the toolbar are:
| Icon | Tooltip | Description |
|---|---|---|
 | Only in Drawing A | |
 | Only in Drawing B | |
 | Both in A & B | |
 | Changed Between A > B | |
 | Show/Hide Filter Panel |
These options can all be selected simultaneously and do not have to be viewed one at a time. The fields in the Equipment Differences grid should provide the relevant information to know how each piece of equipment differs between drawings.
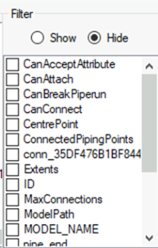
The Show/Hide Filter Panel icon can be used to toggle display of the Filter Panel. In the Filter Panel, specific attributes can be selected to be shown or hidden in the Project Attributes display.
Merge Drawings
Ensure that  is checked so that data changes can be merged between versions.
Optionally,  can be checked to delete the briefcase once data changes have been merged into the drawing.
With all the relevant attributes selected, hitting will open the side-by-side view of the two drawings.
New results are items that have been added to the Briefcase, in this case these are the Redline annotations. Changed results are pre-existing items that have been subject to data changes.
To merge the data changes from the briefcase to the drawing, select all the Changed results and ensure that New results are not selected unless they include actual datapoints that have been added to the drawing. Use Merge Equipment from B to A  to complete the merge once all data changes have been selected. Compare Drawings can be closed once this process is complete.
The data changes from the briefcase should now be merged into the active drawing without adding the redline annotations.
To verify the results, open the active drawing in Drawing Viewer/Editor and check the relevant equipment to see if the properties have been changed.
Graphics are handled in the same way, with the added complication that the view may require moving or re-centering to see the entire graphic. Set views to A only Then B only to ensure you understand what will be changed on merge.