Project Editor
The Project Editor stores all of the plant Data and configuration data for your Engineering Integrity or Safety Integrity Projects. It allows you to modify and edit all project attributes to successfully run safety, design or quality checks on your data.
Project Editor can be opened from the launchpad menu at any level of the project tree.
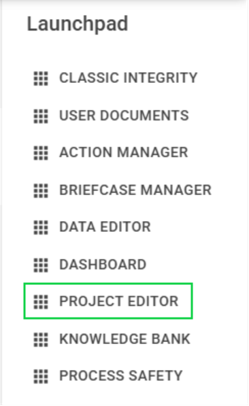
This will open the Project Editor application in a new tab.
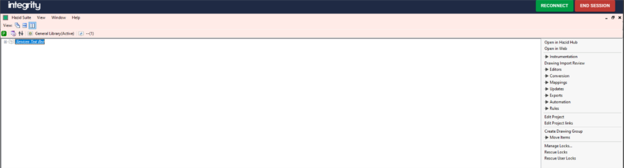
Toolbar
At the top of the application is the main toolbar for Project Editor allowing you to configure how the application looks for the user currently logged in and provide information about the current version of the application.
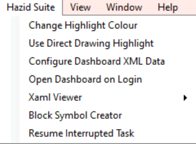
“Hazid Suite” contains the default opening options and to resume any interrupted automated tasks:
The “View” section contains options to change the tiling arrangement of the view panel, swapping between column, row or stacked layouts. These are available as both a list option or as buttons to toggle between the view layout:


The “Window” section is for administrators and only re-opening “Project Editor” should be available to users:

The “Help” section contains the help file, the current version of the Hazid application and allow the generation of detailed diagnostic files for administrators to review:

 Configure Connections – Is an admin only operation that contains the settings for the connections to the knowledge bank.
 Refresh – Will refresh the current Project Tree and update any drawing configurations and user locks.
 View Model Library and
  View Fluid Library buttons, will open the relevant application for maintaining the knowledge library.
Project Tree
The project tree shows a graphical view and allows navigation to any level of the project, the options available in the sidebar will change depending on the selected level.
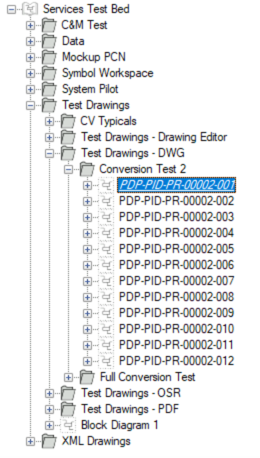
To expand an item in the project tree, click the  button next to the group name to expand the folder and view items within it.
Expanding documents/drawings displays the various configurations available for a particular document.

The icons next to the document/groups name informs of it’s status, whether a document  , a configuration
  , a group
  or the project itself
  .
.
Document Information
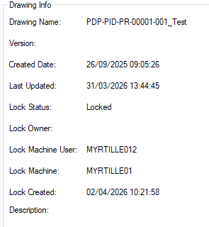
With a document selected in the project, document information along with identifying the user who currently has the document locked in “edit” mode are displayed in the main window.
Sidebar
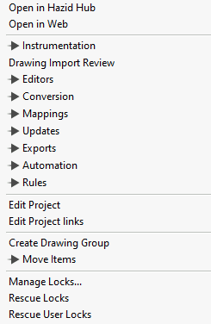
The sidebar is where applications are launched from within Project Editor on the item selected in the Project Tree, the options available are context specific and change depending on the level selected, and the users permissions.
Project Level
With the top of the project tree selected Gives access to:

Group Level
With any drawing/document group selected this allows access to groups:


Document Level
With any document selected this allows access to Documents:


Configuration Level
With a document configuration selected it allows access to the documents configuration file:


Create Documents & Groups
Project documents and group hierarchies can be created through Project Editor
Create Groups
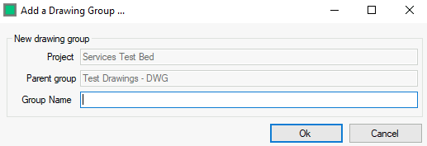
From within Project Editor open select the location from the project Tree where the new group is to be created and choose the “Create Drawing Group” option on the right-hand sidebar.

This will open a dialogue box where the new group name is added
Manage Groups
With Project Editor open select the group in the project tree is to be edited, moved or deleted and choose the appropriate option from the right-hand menu.

Rename Drawing Group will open a new window where the Title and description of the groups can be updated.
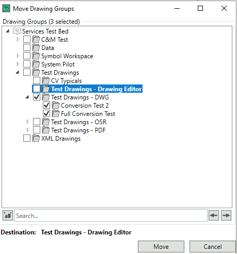
Move Drawing Group will open a new window allowing the selection of a destination where the group and all items in it will be relocated too.
Deleting Drawing Groups will delete the group and all items below it, this process is not reversable.
Create Documents
Empty new documents can be created in Project Editor by selecting the group from the Project tree and choosing the “Create New Document” option on the right-hand menu.

This will open the document creation window, where the user can set the drawing name, an optional configuration name and assign a template file such as a title block and/or border so the drawing contains reference graphics.
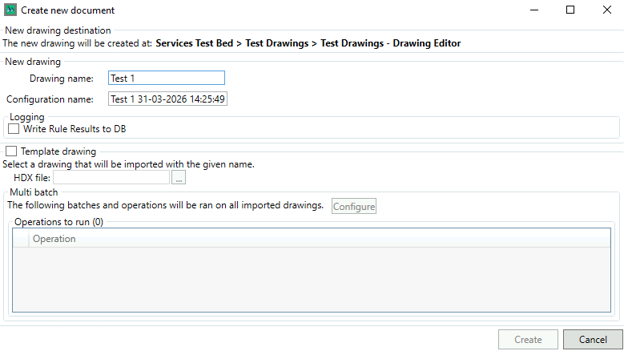
To add a template file enable the checkbox  and click the
  button to open a file explorer, navigate to the template HDX file and click OK.
With all information completed the  button will be enabled, click it to create the new document.
Manage Documents
With the document selected in the project tree options to rename, delete and move the drawing become available in the right-hand menu:

Choosing “Rename Drawing” will open a window to rename the drawing and update the description.
“Move to Drawing Group” will open a window that lets you select the drawing group to move the document to.
Deleting Documents is not reversable.