Model Configuration
To perform rule-based operations on mapped items inside a document we use “Model Configurations” that can be run on any items in the project mapped to a model.
Overview
To access the editor to define these rules we open “Project Editor” from anywhere in the web project, with the top of the project tree selected we select “Rules > Model Configuration” from the right-hand menu:

This will open the Model Configuration window:
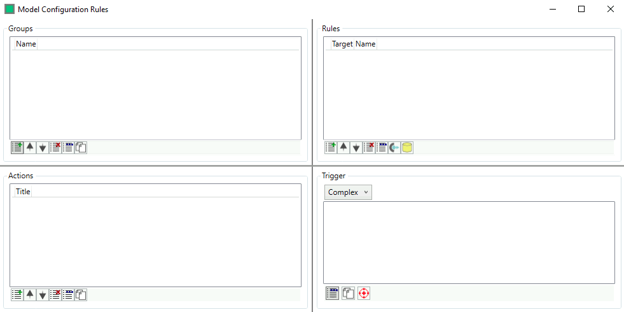
To define the rule, we split it into multiple steps reflected in the 4 panels available in the window these are in order of use; Groups, Rules, Trigger and Actions.
Groups
We run model configurations on the defined group, to start we click the  button in the Groups panel:

This will open a new window where we can define the group name, define the name and click OK

With the group added more options become available, we can edit the group name  , delete the group
  or copy it
  .
.

Rules
With a group created and selected we can add the models/groups the rule will be run on in the “Rules” panel. To create a new rule, click the button:

This will open a new window where we define the name and comment on the rule:

To assign the model to target we use the target section, where we can target a group of models or a single model, in this example we are only targeting the “Ball Valve” models:

If we would like to refine the target based on the data points inside the item, we can press the  button to open the “Property Filter Builder” window where we set the property to filter similar to how we filter in Data Editor.
With the rule target set the panel will update and new options will be available, we can edit the rule name, comment and target or delete the rule .

Trigger
The trigger is where we set the conditions needed for the rule to pass, with the rule selected in the “Rules” panel we can click the button:

This will open the “Edit Rule Structure” window:
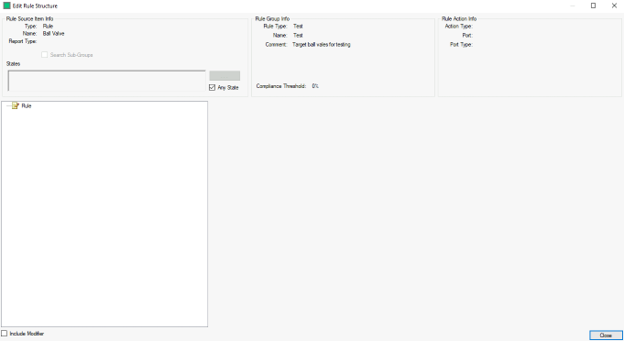
For more information on how to build rule items refer to the Rule Structure Editor
Actions
With the rule source and trigger set we can now define the action that will occur when this rule passes. To create a new Action, click the button in the Actions panel.

This will open the “Model Configuration Action” editor:

We can perform different types of actions by selecting them from the dropdown menu and the editor will update to reflect the options that ned set for the action:

We can set and edit the trigger direct from the action with the use of to open the trigger edit window and with the trigger selected we can click the  button to set that trigger for the action, the trigger will turn red when it has been assigned to an action.

With a new action set and selected the options to delete , edit and copy become available at the bottom of the window. Should your actions need to be run in a certain order we can re-arrange them with the  buttons.
Action List
| Name | Description | Read Trigger | Write Trigger |
|---|---|---|---|
| Clear State | Removes the current assigned state | ❌ | ❌ |
| Connect Equipment | Connects source equipment to trigger equipment | ❌ | ❌ |
| Create Equipment | Creates a new piece of equipment | ❌ | ❌ |
| Detach Equipment | Detaches source equipment from trigger equipment | ❌ | ❌ |
| Disconnect Equipment | Disconnects source equipment from trigger equipment | ❌ | ❌ |
| Link Equipment | Links source equipment to trigger equipment | ❌ | ❌ |
| Remove Attributes | Removes defined attribute from equipment | ❌ | ❌ |
| Remove Equipment | Deletes trigger equipment from document | ❌ | ❌ |
| Set Model | Updates the model for trigger equipment | ❌ | ❌ |
| Set Port | Assign a port type to triggered port | ❌ | ❌ |
| Set State | Assign a state to trigger equipment | ❌ | ❌ |
| Unlink Equipment | Unlinks source equipment from trigger equipment | ❌ | ❌ |
| Update Instruments | Updates instrument data | ❌ | ❌ |
| Update Property | Update defined property using either source or trigger | ❌ | ❌ |