Label Mapping Rules
When a drawing is first imported the text data on the drawing is exactly that, dumb text, with no links to any of the symbols to which it is relevant. There is functionality present within Aurelia to manually convert these text attributes to labels, and connect them to their relevant equipment graphics (via the text and attachments panels), but it is more expedient to use rules to do this.
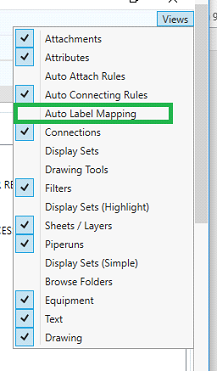
Once the P&ID has opened select “Auto Label Mapping” from the View Menu
This opens the Auto Label Mapping Rule creation window
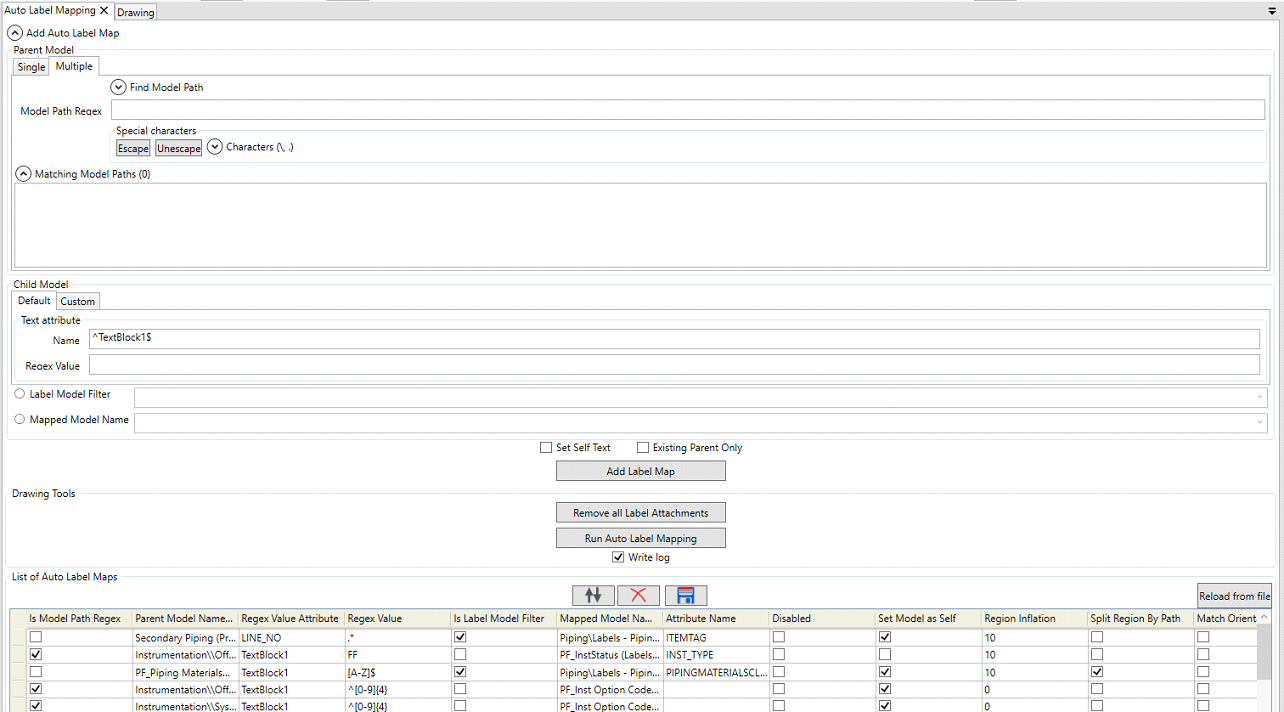
Here you add the item(s) that you wish to enable to connect to each other as labels to parents, you can also edit existing label mapping rules and run the label mapping rules here. To Add a rule you should define the model(s) that you wish to enable label connecting for, if you wish to connect a single model, you should select the item in the drop down list under the single tab

If you wish to define a group of models to connect, then select the multiple tab
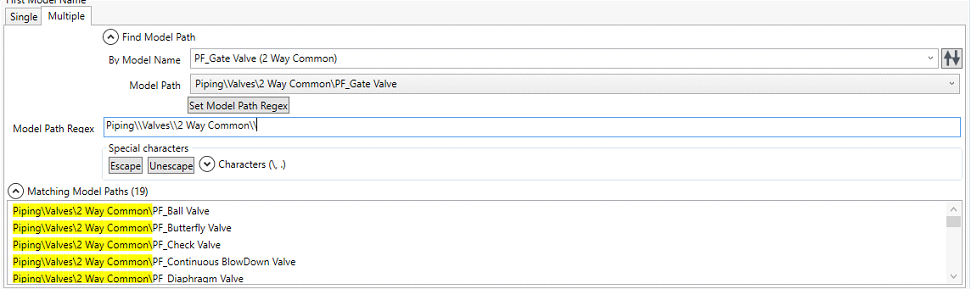
Here you first define a model in the group that you wish to connect, the click the ![]() button to write the path into the regex field, it is then a case of removing the model name and clicking on the
button to write the path into the regex field, it is then a case of removing the model name and clicking on the ![]() button to ensure that the path will be correctly interrogated.
button to ensure that the path will be correctly interrogated.
The next step is to define the child, or text, item that you wish to link to.
The custom comparison allows you to define that a connection can only occur between two items if a given pair of attributes match

We will focus on the default method here, as that is the method most commonly used.

In the Default Mapping you define the Attribute from the child that you wish to select and write to your parent item, using the “Name” box for the Regex attribute name (^TextBlock1$ is the default) and the Regex Value box for the data structure that you wish to move (.* will select all of the data present in the cell).
The Label Model filter Radio button allows you to select a specific model only to move data from, using the drop down list.
Conversely, the Mapped Model Name, allows you to assign a label mapping to any text found that matches Text Attribute search parameters.
The Set Self Text Check box allows you to write a property to the text block, for example, you can move the data from “TextBlock1” to “ItemTag” using this and the Existing Parent Only Check box allows you to limit the search for labels to only labels that are already connected to an item, but where the data has not been populated. Clicking ![]() will add it to the Auto Label Mapping Rule List.
will add it to the Auto Label Mapping Rule List.

The list is editable, so you can make changes to any rule you have loaded/previously created. Rules can be deleted, saved and reloaded here. It should be noted that the “Region Inflation” column can be changed to widen/narrow the search area, and the “Attribute Name” field is used to define the attribute in the parent item that you would like to write any data picked up in the child item to.
The rule list is ordered and should be ordered from specific rules to generalised rules to ensure the most accurate automation.
Auto Label Mapping rules are run using the ![]() button. It should be noted that during the configuration phase of a project, you will need to run, clear and revise the connection rules until you are satisfied with their outcomes.
button. It should be noted that during the configuration phase of a project, you will need to run, clear and revise the connection rules until you are satisfied with their outcomes.