Create An Action
Clicking the ![]() Action (or
Action (or ![]() button in Drawing Viewer) button Creates an action, the Action is defined via the Create Action Window
button in Drawing Viewer) button Creates an action, the Action is defined via the Create Action Window
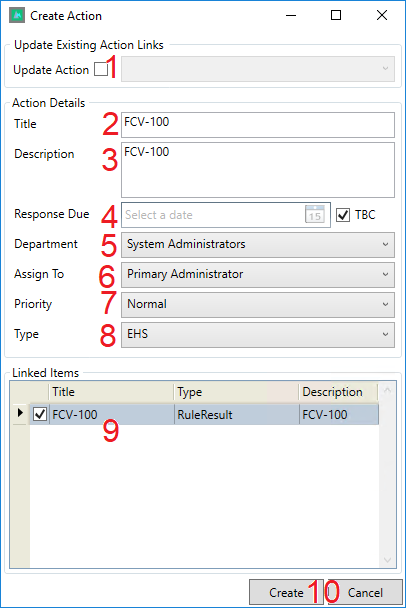
- The Update Action Check box, checking this check box allows you to select an existing action that you wish to update with the Linked Item(s) information that you have currently selected for creating an action against

Note that upon clicking the ![]() button the following warning is displayed.
button the following warning is displayed.

This is incorrect, the update function does not overwrite your existing linked equipment, title and description, it only adds any linked equipment in your current selection on to the existing linked equipment list in the action that you have selected to update.
- The Action Title – If the Action is Against a Single item then the field will be auto-populated with the item tag/name
- The Action Description – If the Action is Against a Single item then the field will be auto-populated with the item tag/name
- The Response Due Data – Unchecking the ‘TBC’ check box allows you to define a response due by date
- Department – The department of the User responsible for the action
- The Assignee – The User Responsible for the action
- The Priority of the Action (High, Low or Normal)
- The Type of Action (Engineering, Instrumentation, Procedural etc.)
- The Action linked items, these are the Items from Framework that are linked to the action, and these can be linked/unlinked using the checkboxes on the left.
- The
 button creates an Action, the
  button Exits the window
Note, not all items can be attached to actions, the main areas where this is available are as follows:
- Rule Results
- Pipe Run Mapping
- Port Mapping
- Rule Editor (Rule Group/Rule)
- Property Mapping
- The Tree in the Model Library
- P&ID items selected from the drawing viewer.