Symbol Manager
The Symbol Manager is used to Import, store and manage Symbols from other authoring tools, and their mapping to knowlege models in the Integrity Suite (where required)
Initially there will be no symbol maps available, so you will need to create on, by clicking on the ![]() button (the
button (the ![]() button edits an existing symbol set, and the
button edits an existing symbol set, and the ![]() button deletes the selected symbol map)
button deletes the selected symbol map)
![]()
Enter the name of the symbol map and click ![]() to save your new Symbol Set, or
to save your new Symbol Set, or ![]() to exit the dialog without creating.
to exit the dialog without creating.
This Creates a new blank symbol map
![]()
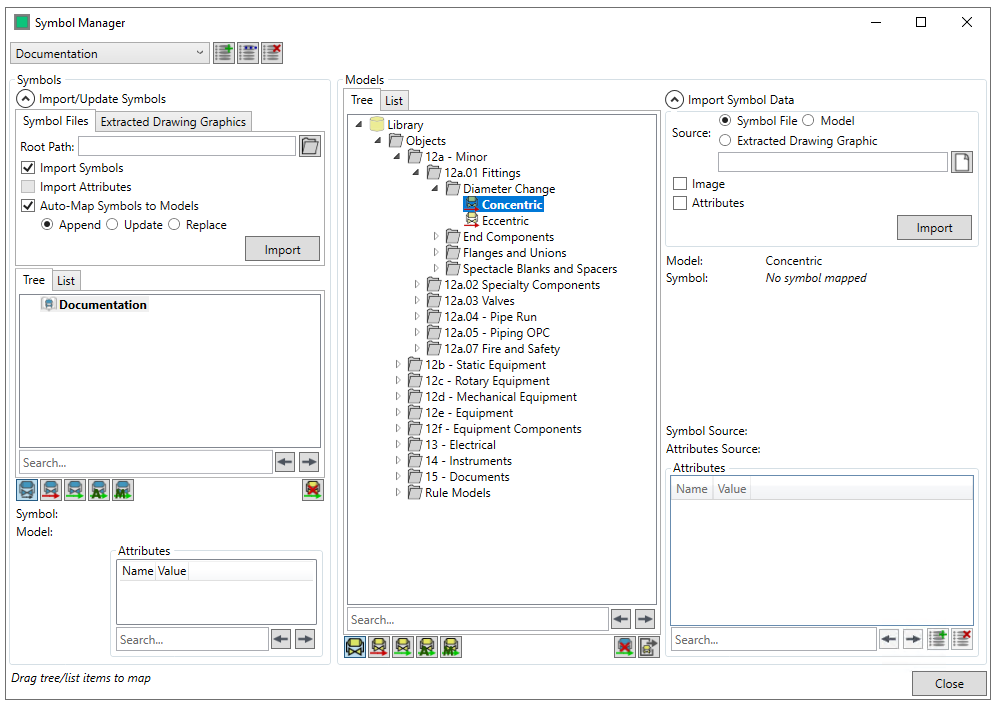
To create a symbol map from SPPID symbols, open the Import/Update Symbols panel with the ![]() button and specify the root location of the .sym files that you wish to use to build the symbol map, either by entering it, or using the
button and specify the root location of the .sym files that you wish to use to build the symbol map, either by entering it, or using the ![]() button to pick a location. (The process to do this is the same for extracted drawing graphics, and is carried out in the same manner within the "Extracted Drawing Graphics" Tab)
button to pick a location. (The process to do this is the same for extracted drawing graphics, and is carried out in the same manner within the "Extracted Drawing Graphics" Tab)
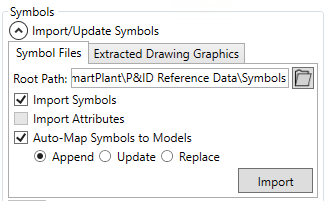
There are three import options - "Import Symbols", if this is checked then the symbol graphics are imported, "Import Attributes" - this imports all the attributes on the symbol if checked and "Auto-Map Symbols to Models" - this automatically matches imported symbols to Integrity Models, based upon their name and properties. This has three further options Append/Update/Replace which allow you to either add to the existing tree, update it with the new symbols or replace them. (the auto-mapping is also available in the extracted drawing mapping import)
Once you have made your selections, then clicking ![]() Imports the symbols.
Imports the symbols.
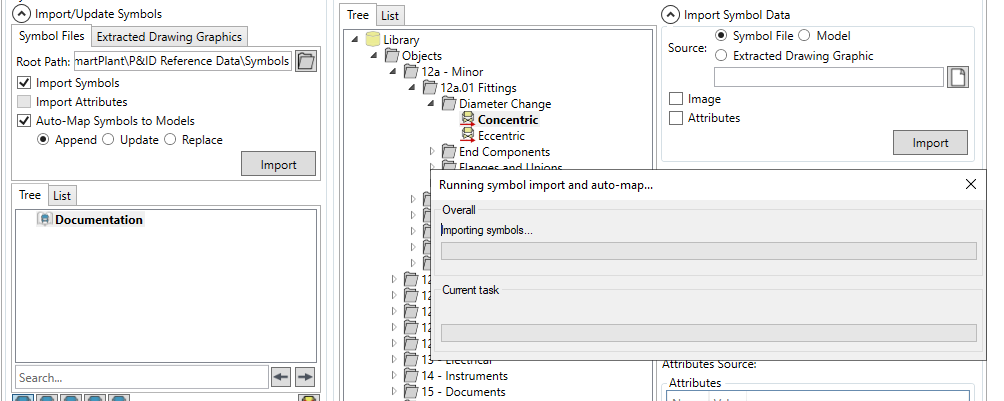
Once this is completed, the Tree is populated with your imported symbols

If you selected the"Auto-Map Symbols to Models" option, then the most symbols should have been automatically mapped to models during the import process.
Automatically mapped symbols are denoted by a green arrow with a "A" over it ![]() , unmapped symbos are denoted by a red arrow
, unmapped symbos are denoted by a red arrow ![]() .
.
There are the following options available

There is a standard search field and six buttons, the six buttons are, from left to right above
- Show All - Show all symbols in the tree
- Show Unmapped - Show only unmapped symbols in the tree
- Show Mapped - Show only mapped symbols in the tree
- Show Auto-Mapped - Show only automatically mapped symbols in the tree
- Show Manually Mapped - Show only manually mapped symbols in the tree
- Delete Selected Mappings - Deletes the mapping(s) that you currently have selected. (This does not delete the symbol or model, only the link between them)
To map an symbol that has not been mapped automatically, drag and drop it onto the model that you wish to map it to
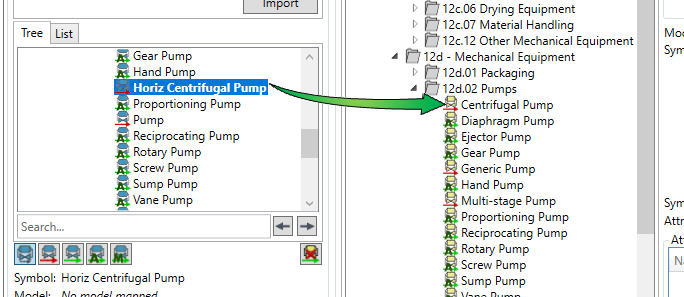
This creates the mapping.
![]()
The Model Tree has a similiar set of options as the symbol tree.

These options are the same as the table above, with one exception, the seventh button ![]() is used to export the graphics of the model to a location that you specify.
is used to export the graphics of the model to a location that you specify.
The Import Symbol Data panel lets you import the graphical data and attributes from a symbol into a model
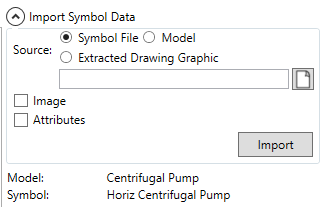
There are three locations that you can import from - A symbol (.sym) file, another model in the tree, and an Exctracted Drawing Graphic. To import from a symbol or extracted drawing graphic, select the file you wish to import from, either by entering it, or using the ![]() button. To import from a model, you can pick from the model list or from the tree using the
button. To import from a model, you can pick from the model list or from the tree using the ![]() button.
button.
There are two checkbox options for the import (Image and Attributes, selection one or both of them will cause the Image/Attributes to be imported)
Once you have made your selections, then clicking ![]() Imports the symbol data.
Imports the symbol data.

Default Attributes can be added to models here, by selecting the model you wish to add it to in the tree, and clicking on the ![]() button
button

Here you add the Name and Value of the attribute.
Clicking on the ![]() button removes your selected attribute.
button removes your selected attribute.
There is a standard search box for searching large attribute lists.
Select ![]() to exit the form
to exit the form