User Management
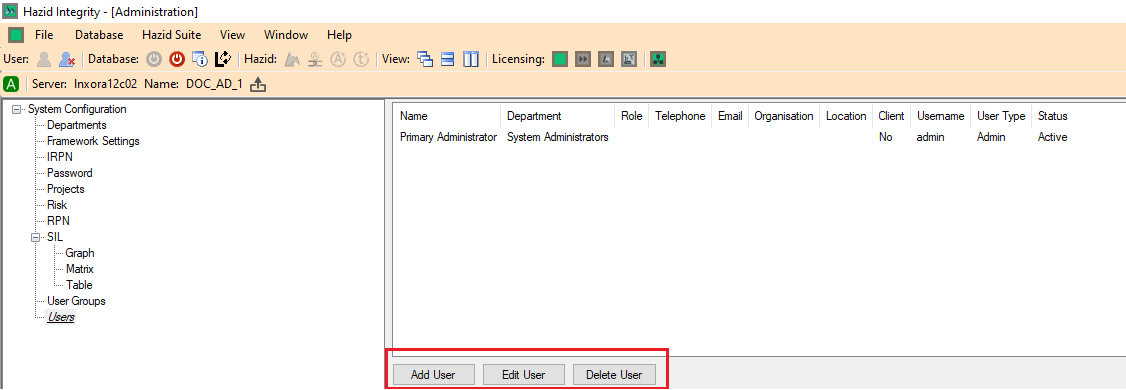
The interface for Creating a User is accessed by clicking on the ![]() button. This Opens the User Management Window (note that the
button. This Opens the User Management Window (note that the ![]() button opens the same window)
button opens the same window)
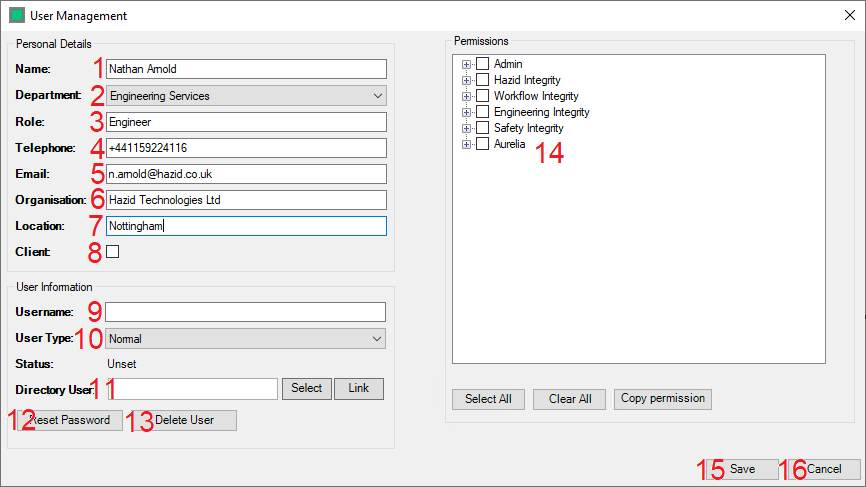
There are several steps to creating a User
- The Administrator enters the Name of the User here.
- The Administrator selects the department to which the user will belong here.
- The Administrator enters the Role of the User here. (If required)
- The Administrator enters the contact telephone number for the User here. (If required)
- The Administrator enters the contact email address for the User here. (Required if the User is to work within the Action Manager)
- The Administrator enters the Organisation to which the User belongs here. (If required)
- The Administrator enters the Location of the User here. (If required)
- The Administrator set whether or not the User is a Client here, this is used within Approval Chains in the Action Manager.
- The Administrator Assigns the User to have a Username in order to Log In to the HAZID Framework here.
- The Administrator Assigns the User Type here, there are two user types
- Normal Users - these Users do not have access to the Administration Menus
- Admin Users - these Users do have access to the Administration Menus
- The User Status - The Windows Active Directory User configuration - if you wish to associate a Hazid User with a Windows User, click on the
 button
 - The Administrator can reset the User Password to the HAZID Framework default (defined in Framework Settings) using the "Reset Password" button.
- The Administrator can Delete an Active User/Restore a Deleted User with the
 /
/  button. When a user has been deleted; 'Delete' button shall no longer be visible and shall be replaced by 'Restore' button.
 - The Administrator can Assign Permissions for every user in the Department here.
- The Administrator can Save the Department Using the Save button.
- The Administrator can Cancel saving the Department/Abandon any changes made to an existing Department Using the Cancel button.
The Delete User button is used to quickly delete a user. However, deleted users are not removed from the database, and can be restored by selecting them and clicking on the ![]() button.
button.