User Groups
The interface for Creating a User Group is accessed by clicking on the ![]() button. This Opens the User Group Management Window (note that the
button. This Opens the User Group Management Window (note that the ![]() button opens the same window).
button opens the same window).
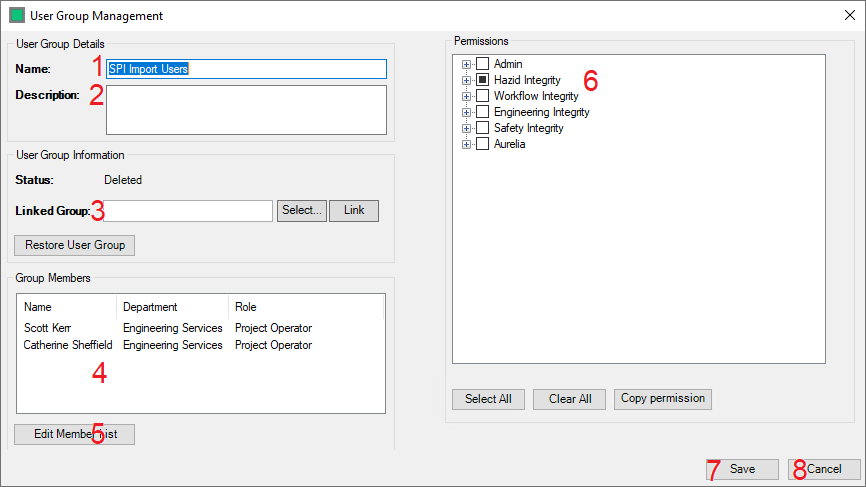
There are several steps to creating a User Group:
- The Administrator enters the Name of the User Group here.
- The Administrator enters the Description for the User Group here.
- The Administrator can Define a Windows User Group that is linked to the Hazid User Group for the purposes of conferring permissions to all members of the Windows User group in a streamlined way.
- The Administrator can view the list of the members (users) that belong to the User Group here.
- The Administrator can Edit the Members of the group by clicking on the "Edit Member List" button.
- The Administrator can Assign Permissions for every user in the Department here.
- The Administrator can Save the Department Using the Save button.
- The Administrator can Cancel saving the Department/Abandon any changes made to an existing Department Using the Cancel button.
The ![]() button is used to quickly delete a User Group. However, deleted User Groups are not removed from the database, and can be restored by selecting them and clicking on the
button is used to quickly delete a User Group. However, deleted User Groups are not removed from the database, and can be restored by selecting them and clicking on the ![]() button.
button.
Editing a Member List
The interface for editing a User Group Member List is accessed by clicking on the ![]() button. This Opens the Set up User Group Members Window
button. This Opens the Set up User Group Members Window
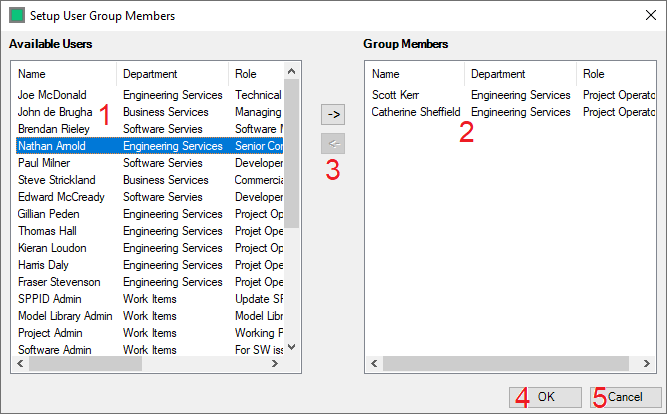
There are several steps to creating a User Group:
- The List of Available Users - this is comprised of all of the Active Users.
- The List of Group Members - this is the list of Users already present in the User Group.
- The Administrator can move Users In/Out of the User Group using these buttons.
- The Administrator can Save the Department Using the Save button.
- The Administrator can Cancel saving the Department/Abandon any changes made to an existing Department Using the Cancel button.